Member-only story
Creating a procedural grid shader in Unity
Let’s make a simple grid graph-based shader for a URP project!
Do you want to create your own adaptive procedural grid material to suit all your level design fantasies? Do you want to get a gentle introduction to Unity’s user-friendly Shader Graph tool? Do you want to discover how we can make easy-to-tweak patterns using just maths?
Then today’s your lucky day, because we are going to discuss how to create such a procedural grid shader step-by-step! :)
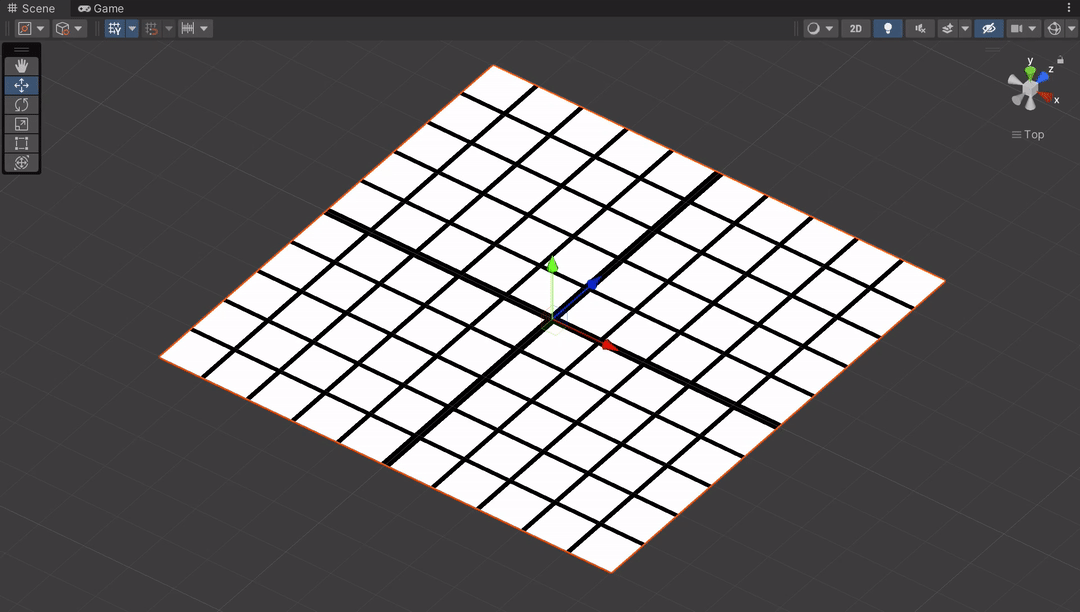
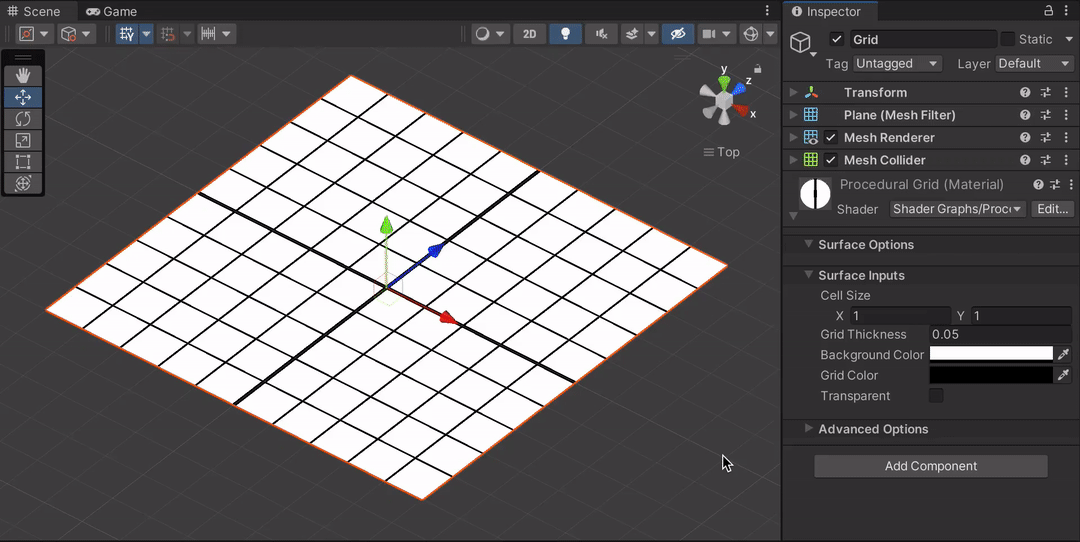
In this tutorial, we’re going to make our own graph-based URP shader to display a rectangular grid in world coordinates with some tweakable parameters. Our goal will be to have this procedural grid offer a controllable cell size and stroke thickness, some colour inputs for the background and the grid lines, and even a toggle to discard the background away and use the grid as an overlay.
This tutorial is available in video or text format — see below for the text version :)
By the way, remember that you can get out all the assets we make in this video for free over on Github, in this repo with all my Unity tutorials 🚀
And with that in mind, let’s get to it and discuss how we can create a URP shader for this procedural grid render…
Generating a grid
In this first part, we are going to setup a basic shader (and its associated material) to put on a plane and display a simple black and white rectangular grid. We’ll also make sure that the grid lines have an adjustable thickness and that we can change the size of the cells on each axis.